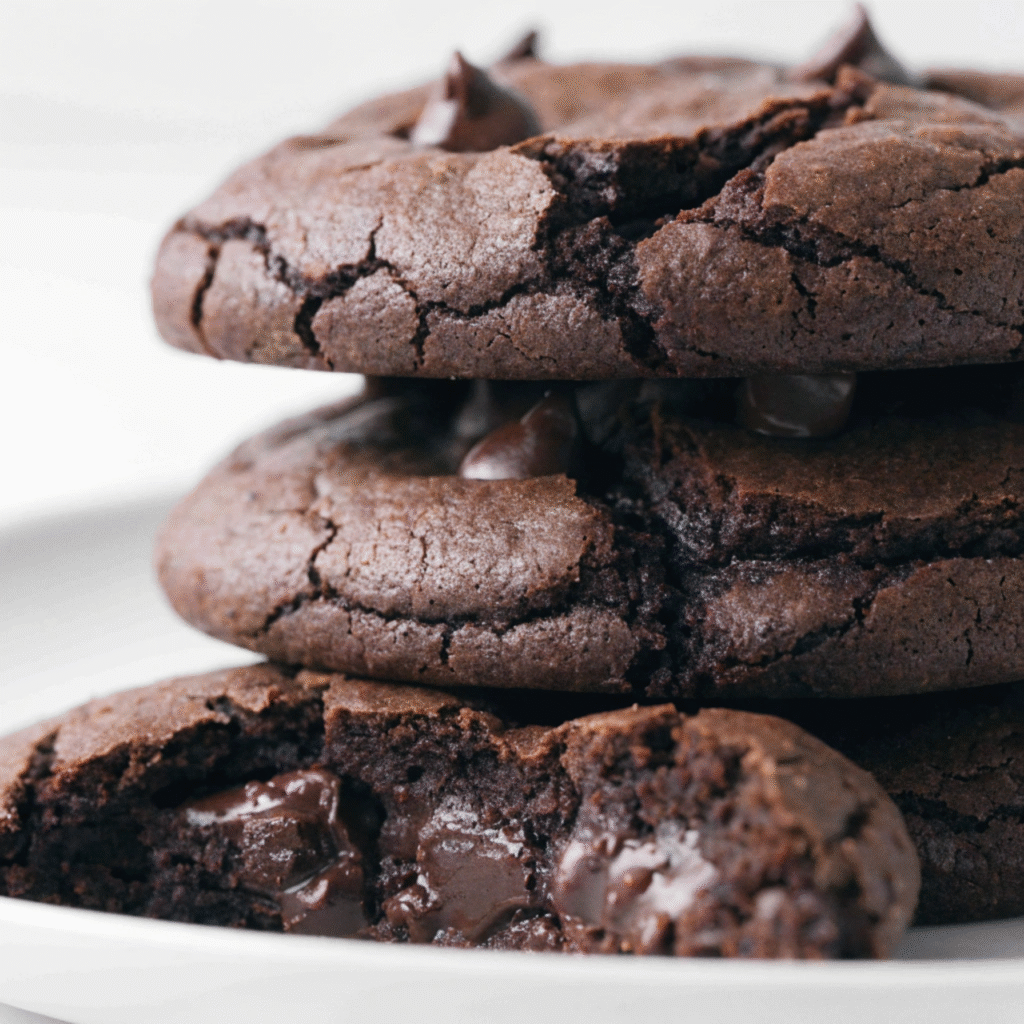
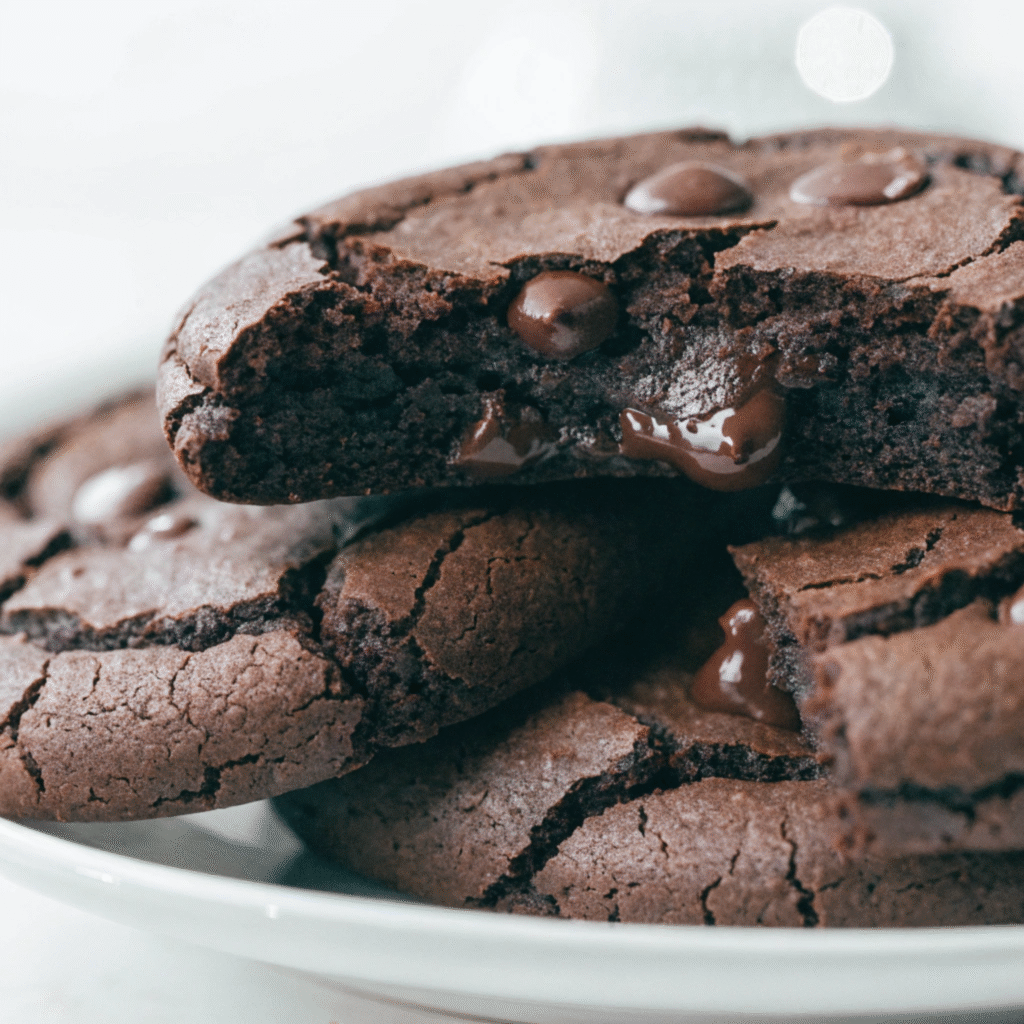
Chickpea cookies pack 6 grams of protein per cookie in just 25 minutes. No white flour, no refined sugar overload, and no compromising on that soft, fudgy, chocolate-chip-studded bite you actually want from a cookie. These come together in a food processor and disappear even faster.
Why This Recipe Matters
Most store-bought cookies deliver sugar and refined carbs with virtually zero protein. One chickpea cookie gives you 6 grams of plant-based protein that adds up to 36 grams in a half-dozen, from a snack most people write off as junk food.
Chickpeas are loaded with resistant starch and dietary fiber, clocking in at 4 grams of fiber per cookie. That fiber slows glucose absorption, which means no blood sugar spike followed by a crash an hour later.
Peanut butter or almond butter brings healthy monounsaturated fats alongside an additional hit of protein. These fats contribute to satiety, so two chickpea cookies genuinely hold you over between meals in a way that standard cookies simply cannot.
Maple syrup provides sweetness with a lower glycemic index than white sugar, and it contributes trace minerals like manganese and zinc. At one-third cup spread across 12–14 cookies, it is a smart swap that keeps the flavor honest.
Ingredient List
Protein Base
- 1 can (15 oz) chickpeas, drained and rinsed thoroughly
- ½ cup peanut butter or almond butter (natural, no added sugar)
Sweetener & Flavor
- ⅓ cup pure maple syrup or raw honey
- 1 tsp pure vanilla extract
Leavening & Seasoning
- ½ tsp baking soda
- ¼ tsp fine kosher salt
Mix-Ins
- ½ cup semi-sweet or dark chocolate chips
- Optional: ¼ cup rolled oats or almond flour for extra texture
Essential Tools and Equipment
- Food processor (8-cup or larger)
- Baking sheet (half-sheet pan)
- Parchment paper or silicone baking mat
- Cookie scoop or tablespoon measure
- Rubber spatula
- Colander (for rinsing chickpeas)
- Wire cooling rack
- Oven thermometer (recommended)
Step-by-Step Instructions for Chickpea Cookies
Step 1: Preheat and Prepare the Baking Tray
Set your oven to 350°F (175°C) and give it at least 10 full minutes to reach temperature. Line a half-sheet baking tray with parchment paper or a silicone baking mat. Do not grease the pan; the natural oils in the nut butter provide more than enough release.
Step 2: Blend the Dough Until Completely Smooth
Add the drained and thoroughly rinsed chickpeas, peanut butter, maple syrup, vanilla extract, baking soda, and salt to the bowl of a food processor. Process on high for 60–90 seconds, scraping down the sides halfway through, until the mixture is completely smooth with absolutely no large chickpea pieces remaining.
Step 3: Fold in Chocolate Chips and Chill if Needed
Transfer the blended dough to a mixing bowl and fold in the chocolate chips with a rubber spatula. If you are adding oats or almond flour for extra texture, incorporate them at this stage as well. If the dough feels sticky or too soft to hold its shape, cover the bowl and refrigerate for 10–15 minutes
Step 4: Scoop and Flatten Each Cookie
Use a cookie scoop or heaping tablespoon to portion the dough onto the prepared baking tray, spacing cookies about 2 inches apart. Unlike traditional butter-based cookies, these do not spread during baking. Gently flatten each portion with the palm of your hand or the back of a spoon to about ½-inch thickness so they bake evenly all the way through.
Step 5: Bake Until the Edges Turn Lightly Golden
Slide the tray into the center rack of the preheated oven and bake for 10–14 minutes. Start checking at the 10-minute mark. The cookies are done when the edges are lightly golden and the tops appear set but still look slightly underdone in the center. Overbaking by even 2 minutes turns them dry and crumbly, so pull them early rather than late.
Step 6: Cool on the Tray Then Transfer to a Rack
Let the cookies rest on the hot baking tray for 4–5 minutes before attempting to move them. They are fragile right out of the oven and will firm up considerably during this rest. Transfer to a wire cooling rack and allow them to cool for at least 10 more minutes before eating.
Nutritional Benefits
Complete Plant-Based Protein. One 15-oz can of chickpeas provides roughly 21 grams of protein across the entire batch, while half a cup of peanut butter adds another 28 grams. Spread across 12–14 cookies, each one delivers 6 grams of mostly plant-based protein.
High Fiber for Gut Health and Satiety. Chickpeas are one of the best sources of dietary fiber in the American diet, with approximately 6 grams per half-cup. Each cookie delivers around 4 grams, which supports healthy digestion, slows carbohydrate absorption, and keeps hunger at bay far longer than a standard cookie would.
Heart-Healthy Fats from Nut Butter. Natural peanut or almond butter is rich in oleic acid, the same monounsaturated fat found in olive oil. Regular consumption of these fats is associated with reduced LDL cholesterol levels and improved cardiovascular markers.
Lower Glycemic Impact Than Traditional Cookies. With no refined flour and maple syrup as the primary sweetener, these cookies have a meaningfully lower glycemic index than standard chocolate chip cookies. The combination of protein, fat, and fiber slows glucose entry into the bloodstream, preventing the energy spike-and-crash cycle.
Chef Tips for Perfect Results
- Dry the chickpeas after rinsing. Spread them on a clean kitchen towel and pat completely dry before blending. Excess water makes the dough too loose and prevents the cookies from holding their shape.
- Use natural, stir-required nut butter. Conventional peanut butter contains added sugar and hydrogenated oils that alter the dough’s texture. Natural varieties with just peanuts and salt give you cleaner flavor and a better bake.
- Do not skip flattening the cookies. Chickpea dough has no gluten structure and no butter to melt and spread. A ½-inch-thick disk ensures the center cooks through at the same rate as the edges.
- Add oats for a chewier bite. Two to three tablespoons of rolled oats folded into the dough introduce texture and give the cookie a more traditional, hearty feel without significantly impacting the macros.
- Chill the dough if your kitchen is warm. In a kitchen above 75°F, the nut butter softens and the dough becomes sticky. A 15-minute refrigerator rest makes portioning clean and results in cookies that hold their shape better during baking.
- Pull them while the center still looks underdone. Chickpea cookies continue setting from residual heat on the tray. A center that wobbles slightly when you move the tray is exactly right.
Common Mistakes to Avoid
Not blending the dough long enough. Under-blended chickpeas leave visible chunks that make the texture grainy and unappealing. Blend for a full 90 seconds, stop to scrape the sides, then blend again until the dough is perfectly silky — no shortcuts.
Skipping the chickpea rinse. The liquid in canned chickpeas has a distinct bean flavor that transfers directly to the dough. Drain and rinse under cold running water for a full 30 seconds, then pat dry before blending.
Overbaking by even 2 minutes. Chickpea cookies have no flour to retain moisture, so they dry out and crumble quickly past their ideal bake time. Set a timer for 10 minutes, check every 90 seconds after that, and pull the tray the moment the edges look golden — not the center.
Moving cookies before they rest on the tray. Right out of the oven, chickpea cookies are fragile and will break apart if handled too soon. Leave them on the hot tray for a full 5 minutes before transferring to the rack.
Using sweetened or flavored nut butter. Added sugar and flavoring in processed nut butters throw off the sweetness balance and can make the cookies unpleasantly cloying. Use plain natural nut butter with one ingredient on the label.
Flavor Variations & Suggestions
Dark Chocolate and Sea Salt. Swap the semi-sweet chips for 70% dark chocolate chips and finish each cookie with a pinch of flaky sea salt before baking. The bittersweet chocolate and salt contrast perfectly against the natural sweetness of maple syrup and chickpeas.
Almond Butter and Coconut. Replace the peanut butter with almond butter and fold in ¼ cup of unsweetened shredded coconut along with the chocolate chips. It creates a flavor profile closer to an Almond Joy bar — tropical, nutty, and still packed with protein.
Cinnamon Raisin. Skip the chocolate chips entirely and add 1 teaspoon of ground cinnamon to the food processor along with ¼ cup of raisins folded in at the end. This variation leans into a snickerdoodle-adjacent flavor that is naturally sweet without relying on chocolate.
Mocha Espresso. Add 1 teaspoon of instant espresso powder and 1 tablespoon of unsweetened cocoa powder to the blender with the base ingredients. The coffee deepens the chocolate chip flavor dramatically and makes these taste like a genuine coffee-shop treat.
Serving Suggestions
Post-Workout Snack with Protein Milk. Serve two warm cookies alongside a cold glass of 2% dairy milk or high-protein oat milk. The combination pushes the protein count of the snack above 18 grams — an ideal post-training recovery pairing that feels like a reward.
Afternoon Coffee Pairing. These cookies pair beautifully with a strong black coffee or an Americano. The bitterness of the coffee cuts through the nut butter richness and makes the chocolate chips taste even more intense.
Crumbled Over Greek Yogurt Parfait. Break two cookies into chunks and layer them over plain Greek yogurt with a drizzle of honey and fresh berries. It turns a simple snack into a satisfying, high-protein dessert bowl at around 28 grams of protein total.
Lunchbox or On-the-Go Snack. Pack two cookies in a small airtight container for a portable, macro-friendly snack that holds up at room temperature for the full school or work day.
Storage & Reheating
- Room temperature: Store in an airtight container for up to 3 days. Place a small piece of parchment between layers to prevent sticking.
- Refrigerator: Cookies keep for up to 7 days and develop a denser, fudgier texture after 24 hours in the fridge — many people prefer them cold.
- Freezer: Freeze for up to 3 months. Freeze in a single layer first, then transfer to a zip-lock bag. Thaw at room temperature for 20 minutes or microwave for 20 seconds to restore that fresh-baked softness.
Allergy Information
Peanuts. The recipe calls for peanut butter, making it unsafe for anyone with a peanut allergy. Substitute with sunflower seed butter (SunButter) for a nut-free version that maintains the same creamy texture and protein contribution.
Tree Nuts. If using almond butter, this recipe contains tree nuts. Swap to peanut butter or sunflower seed butter to eliminate tree nut allergens. Always verify that your chocolate chips are produced in a tree nut–free facility if the allergy is severe.
Gluten. The base recipe is naturally gluten-free. The risk lies in the optional rolled oats — use certified gluten-free oats to keep the recipe safe for celiac or gluten-sensitive individuals.
Dairy. This recipe is completely dairy-free as written. Standard chocolate chips may contain trace milk. Use certified dairy-free chocolate chips such as Enjoy Life brand to keep it fully dairy-free.
Eggs. There are no eggs in this recipe — it is naturally egg-free and vegan when made with maple syrup instead of honey and dairy-free chocolate chips. No substitutions needed.
Frequently Asked Questions
Can I taste the chickpeas in the cookies?
No — when properly blended, the chickpea flavor is completely masked by the peanut butter, vanilla, and maple syrup. Rinsing the chickpeas thoroughly before blending is the single most important step for eliminating any beany taste.
How do I know when the cookies are done?
The edges will look lightly golden and the tops will appear set while the centers still look very slightly underdone — that is exactly right. Pull them at 10–12 minutes and let the residual heat on the tray finish the job; if you wait for the center to look fully done in the oven, they will be overdone by the time they cool.
Can I substitute honey for maple syrup?
Yes, raw honey works as a 1:1 swap for maple syrup. Honey adds a slightly floral, richer sweetness and produces cookies that are marginally denser; the protein and calorie count remains essentially identical.
Can I make the dough ahead of time?
The dough keeps refrigerated in an airtight container for up to 48 hours before baking. Chilled dough is actually easier to scoop and holds its shape better on the tray. Scoop straight from the fridge and add 1–2 extra minutes to the bake time.
Why did my cookies turn out dry and crumbly?
Overbaking is almost always the cause — these cookies have no flour to retain moisture, so they dry out quickly past the 14-minute mark. Pull them earlier next time, and if the dough itself seemed dry before baking, add one extra tablespoon of nut butter or maple syrup to loosen it.
Conclusion
Chickpea cookies are proof that high-protein eating does not have to be bland, boring, or joyless. With 6 grams of protein per cookie, a naturally fudgy center, and melty chocolate chips in every bite.
Print
Chickpea Cookies
- Total Time: 25 minutes
- Yield: 12–14 cookies
Description
No white flour, no refined sugar overload, and no compromising on that soft, fudgy, chocolate-chip-studded bite you actually want from a cookie. These come together in a food processor, bake in under 15 minutes, and disappear even faster.
Ingredients
1 can (15 oz) chickpeas, drained and rinsed thoroughly
½ cup natural peanut butter or almond butter (no added sugar)
⅓ cup pure maple syrup or raw honey
1 tsp pure vanilla extract
½ tsp baking soda
¼ tsp fine kosher salt
½ cup semi-sweet or dark chocolate chips
Optional: ¼ cup rolled oats or almond flour for extra texture
Instructions
1. Preheat the oven to 350°F (175°C). Line a half-sheet baking tray with parchment paper or a silicone baking mat.
2. Add the drained and rinsed chickpeas, peanut butter, maple syrup, vanilla extract, baking soda, and salt to a food processor. Blend on high for 60–90 seconds, scraping down the sides halfway through, until the dough is completely smooth with no chickpea chunks remaining.
3. Transfer the dough to a bowl and fold in the chocolate chips with a rubber spatula. Add oats or almond flour now if using. If the dough feels too soft, refrigerate for 10–15 minutes to firm it up.
4. Scoop tablespoon-sized portions onto the prepared baking tray, spacing them 2 inches apart. Flatten each cookie to about ½-inch thickness with your palm or the back of a spoon — they do not spread during baking.
5. Bake for 10–14 minutes, until the edges turn lightly golden. The centers will look slightly underdone — that is correct. Pull the tray at 10 minutes and check every 90 seconds after.
6. Let the cookies rest on the hot tray for 5 minutes before transferring to a wire cooling rack. Cool for 10 more minutes before serving. Serve warm or store in an airtight container.
Notes
Dry the chickpeas after rinsing — pat them with a kitchen towel before blending. Excess moisture makes the dough too loose to scoop.
Use natural nut butter with one ingredient on the label. Conventional peanut butter contains added sugar and oils that alter the texture.
Pull the cookies while the center still looks underdone. Residual heat on the tray finishes the job. Overbaking by 2 minutes turns them dry and crumbly.
Chill the dough for 15 minutes if your kitchen is warm or the dough feels sticky. Cold dough scoops cleanly and holds its shape on the tray.
Freeze baked cookies for up to 3 months. Microwave for 20 seconds to restore a fresh-baked, fudgy center.
Swap chocolate chips for 70% dark chocolate chips and top each cookie with flaky sea salt before baking for a dark chocolate sea salt variation.
- Prep Time: 10 minutes
- Cook Time: 12 minutes
- Category: High Protein Snacks
- Method: Baking
- Cuisine: American